
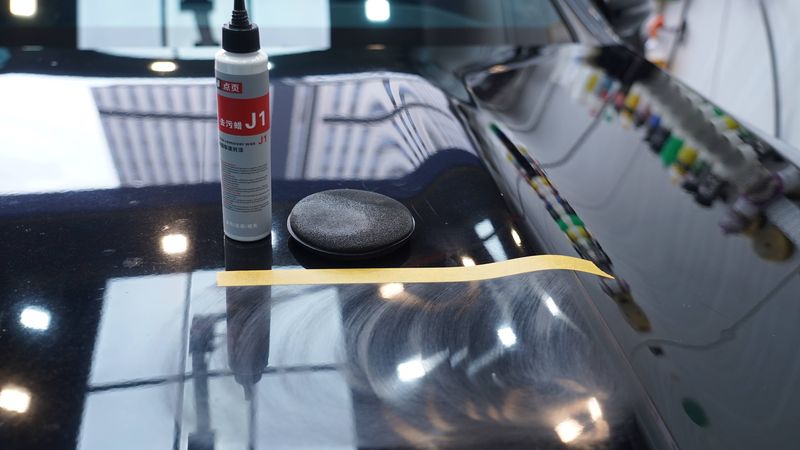
Why Polish After Car Painting? Why Wait 7 Days? — A Practical Guide for Auto Body Shops and Detailing Studios
You spend thousands on a full respray. Then when it’s time to hand the car back, the owner takes one look — the paint looks dull, there’s no mirror finish, and the surface feels rough to the touch.
This is more common than you’d think. Most owners immediately wonder if they got ripped off, but honestly, most of the time the paint job itself isn’t the problem. What’s missing is one critical step — polishing after painting.
The Data Gap: Unpolished vs. Polished After Painting
Let’s look at some real-world industry data.
Same body shop booth, same brand of refinish paint. Unpolished paint surface roughness (Ra) reads around 0.72μm. After polishing? Just 0.1μm — a full 7x difference. Gloss is even more dramatic: unpolished paint sits at barely 60 GU, while a proper mirror finish needs ≥90 GU.
The reason is straightforward. During the spraying process, refinish paint has a particle defect rate of roughly 1.82%, an orange peel defect rate of 0.91%, and a first-pass inspection pass rate of only 88.7%. These defects aren’t about the painter’s skill — they’re baked into the physics of refinish paint. Unlike OEM paint that gets cured at 140–200°C, refinish paint dries at just 60–80°C. The resulting film hardness is only H to 2H, one to two grades below OEM paint, with roughly 30% higher porosity.
That’s why after auto body painting, surface restoration can’t just wait for the paint to dry — you need to use abrasives paired with car polishing wax to eliminate surface defects and meet delivery standards.
Why Can’t You Polish Right Away? What the 7-Day Wait Actually Means
Some body shops rush jobs and try to polish a day or two after painting to get the car out the door fast. I’ve seen plenty of disasters from doing this.
Refinish paint cures in stages:
- Surface dry (3–6 hours): The surface feels dry to the touch, but inside the film is still completely liquid. Don’t even think about touching it.
- Hard dry (12–24 hours): You can lightly touch it, but the film hasn’t reached anything close to its full strength.
- Initial cure (72 hours): The surface has some hardness, but deep solvents haven’t fully evaporated yet.
- Full cure (7–14 days): This is when you can actually polish. 2K clear coat only reaches stable hardness at this stage.
If it’s metallic or pearl paint, wait a few extra days — 10–15 days is safer. These paint structures are more complex and cure more slowly.
What happens if you polish too early? Best case: sanding marks “rebound” — looks fine right after polishing, then all the marks resurface three to seven days later. Worst case: the heat from polishing causes localized semi-melting, the clear coat structure is completely destroyed, and now you’re not looking at a touch-up — you’re looking at a full respray redo.
Three Tests to Confirm the Paint Is Ready for Polishing
Don’t rely on gut feeling. Use these three methods:
① Fingernail Press Test Press your fingernail gently into an inconspicuous area. If there’s no indent and no tacky feeling, the film hardness has reached an acceptable baseline.
② Solvent Wipe Test Dip a clean lint-free cloth in some thinner and gently wipe an inconspicuous spot. If the cloth shows no dissolved residue and the paint surface doesn’t change color, the film has developed solvent resistance.
③ Pencil Hardness Tester This is the most accurate method. Scratch the surface with a 2H pencil — if the hardness reads 2H or above, you’re clear to start.
National standard acceptance criteria are clear: clear coat hardness ≥2H, gloss ≥90 GU, color difference ΔE≤1.5, DOI≥90. If you can’t hit these numbers, delivering the car is just damaging your own reputation.
Refinish Paint Polishing vs. OEM Paint: What’s Different?
Many experienced detailers default to OEM paint parameters when polishing refinish paint. That’s a big mistake.
Refinish paint is one to two hardness grades lower than OEM. Polishing parameters need to come down 20–30% across the board:
- RPM: Compounding stage at 1500–1800 rpm (beginners should stay at 1200–1500 rpm) — more conservative than OEM specs.
- Pressure: 1–3 kg for compounding, decreasing progressively through medium and fine polishing.
- Pads: Wool cutting pad or firm foam for compounding; fine wool pad or medium foam for medium polishing; finishing pad or soft foam for fine polishing.
- Paint surface temperature: Must stay below 50°C at all times. Exceed that with under-cured refinish paint and you’re asking for trouble.
The core principle in four words: go light, not heavy.
The Most Common Disaster: Sanding Mark “Rebound”
This deserves its own section because it happens way too often.
Right after polishing, the paint looks perfect. The technician is happy, the customer is happy. Then three days to a week later, all the sanding marks come back.
The reason was mentioned earlier — during the curing process, refinish paint structure is still relatively loose. If polishing pushes the surface temperature above 60°C, localized semi-melting occurs. It looks smooth at the time, but as the film continues to shrink, those sanding marks “rebound” and become visible again.
The fix: strictly control polishing temperature and pressure, and choose the right abrasive grit size. For compounding, use DianYe J2 Water-Based Polishing Wax — strong cutting power that’s still controllable, reducing the risk of over-cutting. For medium and fine polishing, progressively reduce RPM and pressure, working within a water-based polishing wax system for more stable results.
The Complete Product Chain for Post-Paint Polishing
Here’s a process we’ve validated across a large number of body shop booths:
Step 1: Compound with DianYe J2 Water-Based Polishing Wax Use DianYe J2 Water-Based Polishing Wax with a wool cutting pad or firm foam pad, 1500–1800 rpm (beginners: 1200–1500 rpm), 1–3 kg pressure, to remove surface particles, orange peel, oxidation, and sanding marks. J2 Water-Based Polishing Wax has strong cutting power — it’s the opening move of the entire chain, designed to level the surface, not to produce gloss.
Step 2: Medium Polish with DianYe J3 Medium Polish Wax Switch to DianYe J3 Medium Polish Wax with a fine wool pad or medium foam pad, 1000–1200 rpm, moderate pressure, working evenly across the panel. J3 Medium Polish Wax bridges the gap between compounding and finishing, eliminating the marks left by J2 and preparing the surface for the mirror finish. This transitional step is not optional.
Step 3: Fine Polish with DianYe J5 Mirror Finishing Agent Use DianYe J5 Mirror Finishing Agent with a finishing pad or soft foam pad, 600–800 rpm, 0.5–2 kg light pressure. After a slow-speed pass, the paint reaches a mirror finish. J5 Mirror Finishing Agent performs fine restoration, eliminating holograms and taking the paint from “smooth” to “mirror.” This step is the key to scratch repair and surface restoration.
Step 4: Protect with DianYe X1 Quick Liquid Wax Finally, apply DianYe X1 Quick Liquid Wax for protection. X1 Quick Liquid Wax is a spray-on product — apply by hand, spraying 15–20 cm from the surface, then wipe with a microfiber towel. It forms a protective layer on the paint, adding gloss, water repellency, and UV protection to prevent the freshly polished surface from oxidizing quickly.
The complete process takes surface roughness from 0.72μm to 0.1μm and gloss from 60% to over 90% — all in one pass.
This product chain uses a water-based polishing wax system, which is environmentally friendly, low-odor during application, and gentler on technicians’ skin. Whether you run a detailing studio or an auto body shop, this post-paint polishing workflow can be directly replicated.
One last thing: polishing after painting is not something you rush. Wait for the proper cure time, dial in the right parameters, choose the right products, and the results will match what the paint job cost.